Monday, December 5, 2011

Win a KitchenAid NEW 7-Quart Bowl-Lift Residential Stand Mixer from Kitchenaid and MomSpotted!

I don't know about you, but my Kitchenaid Stand Mixer is my FAVORITE thing in my kitchen. Well, aside from the dishwasher, stove, microwave, and fridge!  I've had mine for about 10 years now, and I think it's time for a larger model! I would love a larger one for the times I make double and triple batches of cookie dough or bread dough, or the like.

Now is my chance, okay and your chance too, to win one! Here's how...

Mom Spotted

Also, be sure to check out the Kitchenaid website to figure out which color you would love to have!!

Ain't she perdy?


Wish me luck, I want to win!!!


Wednesday, September 14, 2011

Amazing BAKED donuts!


Baked donuts? I know what you're thinking. Can they really be as delicious as fried donuts? Um, yes. I couldn't believe my mouth. While I'm not the biggest fan of donuts to begin with, I do on occasion enjoy a cinnamon-sugar coated yeasty donut, they were amazing. mmmm.  I've been on a kick lately to try some new recipes, especially recipes that get the children involved. (Home Ec. anyone?) This recipe was perfect for them to help. And who knew 5 y/o Syd was such a whiz at cracking eggs! She's a better egg cracker than her 10 y/o brother - but don't tell him I said so.

Enjoy the recipe! (I can't remember where it came from, sorry)

BAKED DONUTS

1 1/3 cups warm milk, 95 to 105 degrees (divided)
1 packet active dry yeast (2 1/4 teaspoons)
2 tablespoons butter
2/3 cup sugar
2 eggs
5 cups all-purpose flour
A pinch or two of nutmeg, freshly grated
1 teaspoon salt
1/2 cup unsalted butter, melted
1 1/2 cups sugar
1 tablespoon cinnamon

Place 1/3 cup of the warm milk in the bowl of an electric mixer. Stir in the yeast and sugar and set aside for five minutes or so to let it proof. Stir the butter into the remaining cup of warm milk and add it to the yeast mixture. With a fork, stir in the eggs, flour, nutmeg, and salt - just until the flour is incorporated. With the dough hook attachment of your mixer beat the dough for a few minutes at medium speed. Adjust the dough texture by adding flour a few tablepsoons at a time or more milk. You want the dough to pull away from the sides of the mixing bowl and eventually become supple and smooth. Turn it out onto a floured counter-top, knead a few times (the dough should be barely sticky), and shape into a ball.

Transfer the dough to a buttered (or oiled) bowl, cover, put in a warm place, and let rise for an hour or until the dough has roughly doubled in size. Punch down the dough and roll it out 1/2-inch thick on your floured countertop. With a 2-3 inch cookie cutter, stamp out circles in the dough . Transfer the circles to a parchment-lined baking sheet and stamp out the smaller inner circles using a smaller cutter. If you cut the inner holes out any earlier, they become distorted when you attempt to move them. Cover with a clean cloth and let rise for another 45 minutes.

Bake in a 375 degree oven until the bottoms are just golden, 8 to 10 minutes - start checking around 8. While the doughnuts are baking, place the butter in a medium bowl. Place the sugar and cinnamon in a separate bowl. Remove the doughnuts from the oven and let cool for just a minute or two. Dip each one in the melted butter and a quick toss in the sugar bowl. Eat immediately if not sooner.
Makes 1 1/2 - 2 dozen medium doughnuts.


When I make these again, I will double the spice inside the dough. (Instead of cinnamon in the dough, I used pumpkin pie spice.) I will also roll the dough a tad thicker than 1/2 inch. And instead of big circular donuts, I'll make all donut holes :)

Tuesday, September 13, 2011

Homemade Ice Cream in a Bag!


Today we made ice cream in a ziploc bag! The recipe came from this blogger, giving credit where it's due. You'll find her pictures much more informative than mine too.

Here's the recipe and instructions:

2 TBL sugar
1 cup half & half (or light cream)
1/2 tsp vanilla extract
1/2 cup coarse salt or table salt
ice
gallon-sized Ziploc bag
pint-sized Ziploc bag

Mix the sugar, half & half and vanilla extract together. Pour into a pint-sized Ziploc baggie. Make sure it seals tightly. Now take the gallon-sized Ziploc bag and fill it up halfway with ice and pour the salt over the ice. Now place the cream filled bag into the ice filled bag and seal.

Be sure it is sealed tightly and start shaking. Shake for about 5 minutes. Open the gallon-sized bag and check to see if the ice cream is hard, if not keep shaking. Once the ice cream is finished, quickly run the closed pint-sized baggie under cold water to quickly clean the salt off the baggie. Open the baggie and serve immediately. 

You might want to let each child make their own. Especially if you have older children. We made one baggie and I split it between the three children. While it was the perfect amount for an after-lunch snack, it really is just a tease. :) However, since my children are not used to having ice cream in the middle of any given day, it was a welcomed snack and I didn't hear a single complaint!

You can also add your favorite fixins! Just beware, it melts pretty quickly!
 

We also came to the conclusion that it tastes just like Chick-Fil-A's "Icedream"!!  But, without all the added junk. (sorry CFA, but there are a lot of ingredients in there! see here)

Monday, September 12, 2011

twine-wrapped "letter wreath"

Here is my first official finished project inspired by something I've seen on Pinterest! It's pretty self-explanitory, and if you're craft enough to make one, you don't need instructions. This project was inexpensive, not very labor intensive (I did it while catching up on my DVR), and really you can't go wrong with decoating it and choice of hanger. At first I thought when turning a corner of the letter all the bulk was going to look terrible and I was somehow doing it wrong. Then I went back over to Pinterest and looked around to see that's how they all are. So, if you're a perfectionist, you might want to wrap carefully, but other than that, this is a project that my 5th grader could do! (Well, with help with a hot glue gun).


To check out all my pins on Pinterest, follow me HERE!

Wednesday, August 3, 2011

Subway Art

Subway art is "all the rage" right now. (The hubs totally makes fun of me for using that saying, but it's okay, I'm used to it.) I've been seeing this trend a lot over the last year. Not only online on blogs, pinterest, and store websites, but I've also seen it quite a lot in person.

In my own interpretation, this type of art is where you take a grouping of words, each cut (or printed) in different sizes, fonts and sometimes colors, and apply it to a plain background. These can be made from wood, stretched canvas or I've even seen people apply them directly to their wall.

After seeing this trend for so long, I finally decided to give it a shot.
Here's what I came up with.


Whatcha think?

I upcycled an old painting (well, I think it was actually printed onto the canvas). I got out the trusty bin of acrylic paint and coated the canvas with a slate color. Then to make it interesting, I brushed a little black around the edges to give it some dimension.

As the paint was drying, I decided on what I wanted my art to say. I went through many possibilities - children, family, crafting, famous quotes, bible verses, and so on. Once I decided, then I realized my scrapbook papers and carstock wasn't exactly easily accessable. I was about to dig it out from the closet under the stairs when the idea hit me! Magazines!! So, I went through my stash and pulled out a few Pottery Barn mags - including Teen and Kids. I tore out pages that had large pops of colors in the pallet that I wanted, and set them aside.

Next I jotted down the verse I settled with on a paper - making sure not to misspell anything and decide on a rough layout. To sum up a long and tedious process, I cut out all the letters using a Cricut machine. (Lyrical Letters cartridge). When they were all cut and placed, I carefully glued them on using a decoupage medium and a paint brush. Tweezers were also involved in this task. Once the letters were all set in place, glued down, and the air bubbles smoothed out - I gave a final coat of the decoupage over all the letters and over the entire canvas, sides and all.  I let it dry overnight, mainly because I didn't finish it until LATE - too late to admit in print - and once it was dry the letters are sealed onto the canvas nicely, and it's even water resistant!

I really like how it came out. Now to find a place for it to live...or maybe it'll end up in my Etsy Shop!

Saturday, July 9, 2011

Liven up your t-shirts with Freezer Paper

I've been wanting to try a technique that I've read a lot about over the last year or so. Unfortunately, I kept on forgetting to buy what I needed from the grocery store. Now I wish I had done this much sooner, freezer paper stencils are genious! If you've never worked with or bought freezer paper, it is pretty cool and very versitile. Many quilters use freezer paper for making appliques. However, I'm going to jazz up a rad tie-dyed t-shirt that I made for a very special teenager in my life.

She and I have an inside joke, if you will. We constantly try to get that happy little song "Sunshine, Lollipops & Rainbows" by Lesley Gore, stuck in eachother's heads. It's silly, but once it's stuck in mine, it plays on a continuous loop all day long. Then the children sing it, the hubs sings it. I bet if she could, our dog Maty would sing it too. So.....  There wasn't a better phrase to put on the front of this pretty shirt!

First I grabbed the freezer paper. Because I finally remembered to buy some at the grocery store.


Then I cut a few pieces to size, and fired up the Cricut machine.


I used the "Lyrical Letters" cartridge and used three different fonts.

*When feeding the paper into the machine - make sure the shiny side of the paper is facing DOWN*

After they were finished on the machine, I trimmed them up, but not trimming too much near the letters, so the paint has somewhere to go near the edges. Make sure you don't forget the little dots inside your letters, such as e, o, p, R and so on. (or whatever letters you have with dots inside)

If you don't have access to a Cricut machine, you can do this by tracing a printed piece of paper, then using an exacto knife to remove the letters (or image) to create a stencil.

Lay pieces in place on t-shirt - fitted onto your ironing board. (I forgot to get pics here, sorry)
Once they are in the right places, carefully iron them down, without using steam. They will magically stick! Don't over-iron, I've learned that it tends to lift a little around the letters if you do so.


Once your paper is ironed on, slip a piece of cardboard under the letters, and then slide the shirt and board off the ironing board.

Now is time to break out the fabric paints and paint brushes. Some fabric paints require a heat setting, so read your bottles or instructions. I had some "puffy paint" (remember that!) on hand, and by using a brush, I got a nice smooth finish.  Depending on what color you are painting over, you may need to use a few coats.


Since I am not a patient person, I used the blowdryer between coats.
And when the hubs asked me to bake him up a batch of chocolate chip cookies, I put him to work with the dryer. :)


Once your letters are dry, you can peel off your paper. Go slowly and try to avoid ripping the paper. You will need to grab a pair of tweezers to get the "dots" out of those letters that we talked about.


Look how nice it came out!
The word "sunshine" has a glitter painted over it to make it sparkle.
The possibilities are endless.

(do you see the heart I tie dyed?)

Reclaimed Wood - Pallet to Bench

I had a craving. And it wasn't for the usual: chocolate. It was to build something.
Power tools are no stranger to me. We built our own home a few years ago, and I was as involved in that process as I could be. One of my fondest memories, and a very lengthy task, was the door and window moldings. Instead of the big box store prefabs, we chose to make our own. It was very time consuming, but we love the results! We had to cut each pine board to size, then router and sand. Then to install, nail them into place. It was quite the task - and we put many of our family members to work!

(not the children! However, Stephen was busy learning Spanish from our brick and concrete guys).

Okay, back to my craving.

I had the thing all day. The craving, that is. When I'm having a "wood-building-constructing-kinda-feeling", the first place I head to is my absolute favorite inspirational place for wood working - http://ana-white.com/. Ana posts "free and easy" woodworking plans, if you hadn't seen her site, you really should take a moment (after you finish reading this post) to check it out.  So, I searched through plan after plan, and couldn't decide what I wanted to make. I also didn't feel like driving to town to get lumber, so I decided to check our little stash of scrap wood out at the edge of our property, in the woods.

And I looked like this:


And in my pretty purple dress, I dragged these closer to the house to deconstruct.


After hammering and pulling and twisting and groaning, I managed to get all the boards apart.


I didn't use any of the plans I had seen, but since I studied some table plans earlier (Thanks, Ana!), I had the basic idea of how to construct a table. And in my case, I wanted to make a bench, so I just made the legs really short.

Here is my frame. No plans. No pattern, I cut as I went. (and honestly, most times that is how I design my clothing and sewing projects too!)


Once the frame was assembled - I found some scrap 4x4 pressure treated pieces in the garage for the legs, I chose some pretty and rustic boards from the stash to use as the seat of the bench. I removed the rusty nails, and laid them in place, ready to be cut.


Once I figured how much I wanted them to overhang, I started cutting.
(this little baby is my favorite tool!)


I then nailed all the boards onto the frame using a nail gun hooked to an air compressor.
Now the bench is ready to sand.


This is the final product - it took me about 2 hours to make it. Just long enough for the hubs to coach his baseball team. He got back home when I was almost finished sanding. To my surprise, he LOVED the new bench! Which made me really happy and proud of myself. And he didn't even get upset that I touched all of his toys power tools. :)


I will stain this pretty little thing another day.
I love the rustic reclaimed wood, but I don't love the legs.
But, I used what I had, and built something out of nothing!


Now doesn't that make you want to go build something?!

Monday, January 31, 2011

$20 Gift Certificate Giveaway!

From now until Thursday, February 3rd, at midnight EST, LuluBelle's Couture is having a giveaway happening on our Facebook page! Here's the details and how to enter:

4 ways to enter, each can be done once per person. Here's how to enter...


‎(1) Suggest the LuluBelle's Couture Facebook page to 5 friends and comment that you did so. Bonus: if your suggested friend(s) enter and mention your name, you will get another entry!

(2) Tag LuluBelle's Couture in your Facebook status about this giveaway - this only counts if your link shows up on the LuluBelle's Couture wall.

(3) Blog about this giveaway and comment on the LuluBelle's Couture Facebook wall with the link to your blog post.

(4) Buy 5 entries for $1 by sending as "gift" to lulubellescouture@yahoo.com via paypal. Comment that you did this. (This will be verified)

~~All Enrties must be received by Thursday, Feb 3rd by midnight EST. Winner will be chosen at random.

ENTRIES MUST BE POSTED ON FACEBOOK WALL TO COUNT!

Friday, January 14, 2011

I'm a Wilton 'Pops in a Post' Finalist! Now, go vote!


Please take a moment and vote for me daily!
There is no signing up, or entering your personal info, just click "vote"!
The winner gets a $500 Visa gift card!

Thank you SO much!! ~Heather

Monday, January 10, 2011

An Indiana Jones themed birthday party

This post is really late in coming, but better late than never! We had an October birthday and the birthday boy wanted an Indiana Jones birthday party. I hadn't seen an Indiana Jones movie in Sooooo long so I turned to the internet to help me on my way.  As it turns out, there wasn't very much to be found. So, I also wanted to post this to help anyone else in need of this same theme.  Some ideas I used were found online, but since it's been months, I have no idea where to give credit. SORRY! I will say, the party was in November, right after Halloween, and I was able to scoop up some (gross) Halloween goodies at 90% off prices!! You know I love a bargain! 

***THE INVITATION***
I bought some scrapbook paper that looked like an old map.
In Word, I created the text and formatted it to print several times on one sheet. (Google "Indiana Jones Font" to download the font. I think mine was called Fedora.)
I cut them apart and burned the edges with lighter. (do this outdoors, it creates lots of little harmless ash) I found that putting out the little flames was easiest done with my fingertips. Blowing on it didn't always work. Be careful and use common sense!

Then I glued these papers to a larger piece of cardstock, repeating the burning effect on those edges as well.  Now it looks old and awesome!  I coffee-dyed the envelopes and baked them in the oven for a few minutes to make them look equally as old and wrinkled. The final touch was some red food coloring drops to make it look like blood.  I also bought a stamp that says "DANGER" and stamped it crooked across it, leaving enough room for the child's name. (I wish I took a pic of those, sorry)


***THE FOOD***

While the food was in the oven, the kids all played with their whips outside. I downloaded the theme song from Amazon and played it on a loop for the kids, having the outdoor speakers and the inside speakers on. They also played a little football :)

The dessert spread

 The Brain Cupcakes


Bones
(homemade marshmallows piped into bone shapes) 

White Chocolate Skulls
(Wilton mold)

Bloody Fingers & Toes
(sugar cookies with slivered almond "nails", dipped in Wilton candy melts)

 The munchies
Including: Dead Bugs (Pizza Rolls), Mummies (Crescent Dogs), Moth Wings (Chips), Petrified Worms (Cheetos)

Mummies
(crescent roll wrapped hot dogs with mustard eyes) 


AB Negative Blood
(ketchup in a Wilton squeeze bottle. google 'blood bag label')
Squeezing this out was kind of making everyone queasy!

 Drinks - nothing special (tea, lemonade & water)


***THE GAMES***

MISSION 1: Find the Lost Idols


After listening to their mission, they each took turns digging through MONKEY BRAINS! (cold cooked spaghetti) There were several little gummy skeletons (non-edible) that needed to be found. It was hard since the skeletons felt exactly like spaghetti! (another Halloween find)


Next they had to fish through EYEBALL SOUP to find small clear bouncy balls that had little black spiders in them. The "eyeballs" were peeled grapes, and they were pretty slimey!


MISSION 2: The Arc of the Covenant

I spray painted a large box gold and wrote "DANGER" on the sides in black. Then I took brown paper bags from the grocery store and ran them through the paper shredder. I filled the box up with the brown paper and fake spider webs (that also graced my light fixtures, fireplace, staircase and front door). Then loaded it up with "gross" body parts gummy candy and lots of little toys and such. (more Halloween clearance finds) Then on top of all of it, I put in all the toy snakes, bugs, and reptiles I could find from the playroom. This was where the kids got to fill up their goodie bags to take home. (sorry I didn't get a better picture of the box)


Since the kids were digging around "snakes", when they finished filling up their goodie bags, they had to immediately drink a vile of the antidote!


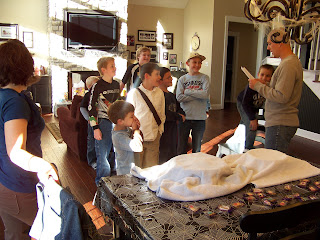
Next came gift opening...


Then we sang the birthday boy his birthday song...
I still can't believe my first born is TEN years old! Double digits!!


All the boys had a GREAT time!
MISSION ACCOMPLISHED!